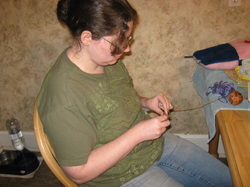
Kristina got on a little monster kick the other day. Unfortunately the drive didn't last too long but she did make a few items to show off. Here she is hard at work in my kitchen. Would you believe this girl has so much talent, creativity and beauty in one total package?!? Ok so might be biased due to the fact I am her mom and she totally takes after me but I am sure you can see what I am saying!!
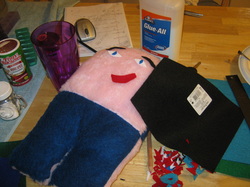
Here is the snuggle monster she was creating. Looks adorable doesn't it? The creature is reversible so is happy on one side, kind of mean looking on the other. Guess which side is up now?
Basically Kristina drew a shape on paper and then we transferred it to the back of the furry cloth, cut out the shapes and sewed them together. We stuffed the creature and then Kristina made some cute faces with felt scraps and buttons. You can glue these on or sew them, your choice.
Well frogs aren't really monsters some people do find them scary! Here is Kristina's frog hat in a 0-3 mo size! This soft and squishy hat is made with homespun in a couple colors with big googly eyes, what baby (or anyone!) wouldn't want one? Could be special ordered in your choice of colors and any size desired via our Etsy shop! :)
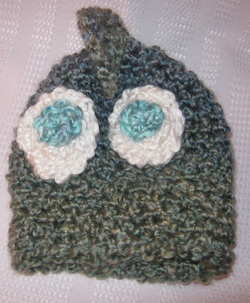
Here is a picture of her oh so adorable sea monster baby hat. Created with homespun it's soft and cuddly. (Homespun makes great hats, soft, thick and oh so warm!) The guy has some googly eyes and that fin you see at the top makes it wavy, wiggly way all the way down the back of the hat. Visit our shop at 2crochethooks.etsy.com to see more pictures.
We do love special orders so if you have to have one for yourself, just send an email to us!

Like most people we have begun to worry about our impact on the environment. As crafters and mothers we want to make sure that we aren't adding to the trash heaps but rather saving items from ending up in a landfill. That being said we also want our items to be beautiful treasures that will never find their way to landfills once purchased.
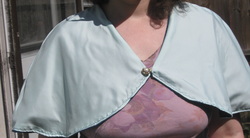
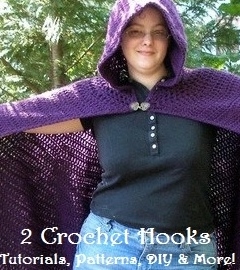
Believe it or not this beautiful caplet (yes it is just one, it's reversible) is made with 99% post consumer items. The cloth was rescued by our local Scrap Exchange (www.scrapexchange.org), one of our favorite places on the planet. I say 99% because the thread used to sew it with was new of course, hard to sew by machine with old thread.
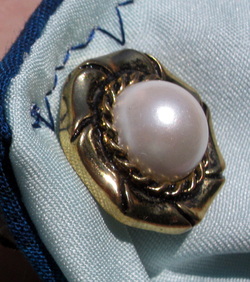
Even the beautiful buttons were rescued from an old shirt that had outlived its usefulness. (We are thinking of a project for the rest of the shirt). This beautiful button, and its pair on the other side, did not deserve to be thrown in the trash, they are still lovely to behold.
We still have a ton of rescued cloth from the scrapexchange so keep an eye out for more upcycled treasures!To see our other caplets and sewn items visit us here
http://www.etsy.com/shop/2CrochetHooks?section_id=10365043

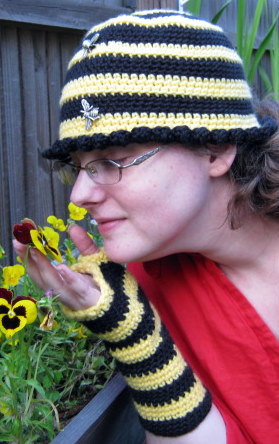
Kristina was stung by some mean old bees the other day! WOW!! Lol so they are pewter bee beads and they only stung her imagination.
We found the beads at our local scrap exchange. The beads were donated by Burt's Bees and there were a TON of them.. well it may not have literally been a ton but there were a heck of a whole lot. They were a great find and we wish we had gotten more because they are all gone! The bees are made of pewter so they are very weighty and elegant and have such good detailing they are amazing.
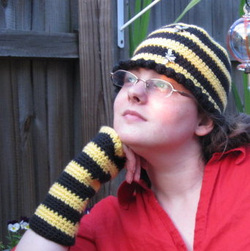
Kristina fell in love and immediately imagined a black and yellow stripped hat with bees all over it. Since they were heavy she only added a few but they look great. Then still buzzing with ideas, she made gloves to match. These were actually her first pair of finger-less gloves and I think they turned out hummingly! The whole set looks nice and elegant without being overwhelming.
http://www.etsy.com/listing/76884528/crochet-hat-and-fingerless-gloves-setFeel free to let me know what you think (good or bad) in the comments below, we are always looking to improve.
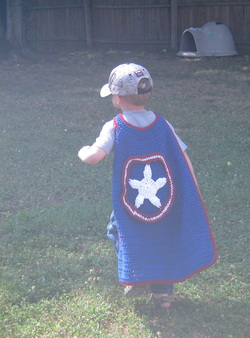
Latest big thing around Durham is Super Hero Capes! So Kristina and I thought we would make some of our own. Man was it fun! We made the basic style of cape, an edged cape and batman style cape.
Here Bob models the Captain America style. He loved the blue cape - but wanted the star taken off so it could be a "Spiderman cape". Yep, he is totally stuck on Spiderman and you can't remotely tell him Spidey did not wear a cape.
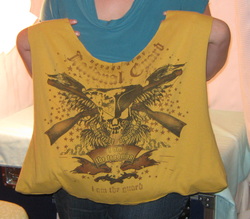
David has grown again - not sure why he keeps doing that but I suspect just to make me mad! lol :)
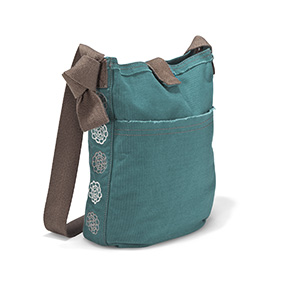
So he swapped me a year's worth of meals for some used t-shirts and jeans. With such an abundance of t's, we decided to make a few tote bags.
My favorite thing to do is special orders! Its amazing to get someone else's input and make something special, and specific, just for them. I love to know that it is exactly what they want and not something they would settle for.
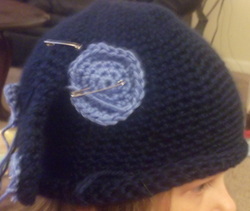
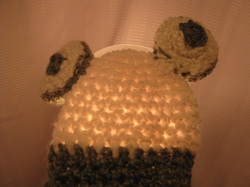
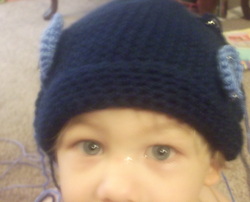
The hat pictured here is based off of one I had done earlier, based on Blue's clues. A customer requested it in different colors and big enough for his little one to grow into. I was more than happy to oblige. Step 1 was to get him a color chart to pick his colors from. Then I went to the store and bought the ones he asked for. They did not have his exact blue so I got the next darker shade. Then I made the hat, with plenty of growing room, and the spots, and ears.
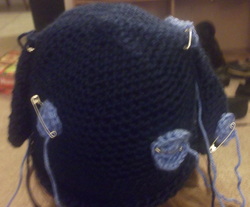
I then pinned everything in place, as you see from the pictures, to get final approval. Once I knew the customer was super happy with it I sewed all the pieces on, now I just have to get to the post office to ship it out. Yay! Its so much more fun to make something for someone because you know they will love it! If you have anything you want made please let us know, we would love to make something special just for you!
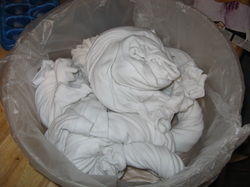
Kristina told me all about this blog post she say where they were tie dying with ICE! I had to try it!
Wet your shirts and wad, tie, knot, etc. how you want them, and put them in a bucket or something to hold them. I opted not to use a rack and next time I will.
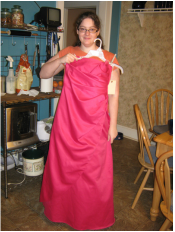
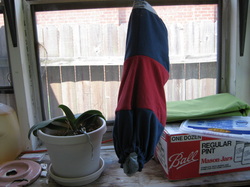
Kristina loves pink and when she saw this prom dress at Recyclique, she had to have it. Well sure it's a couple sizes too small but who cares? She wanted it turned into a skirt and this is how we did it. Easy peasy!
We have made quite a bit of tarn lately which means we have a lot of scraps - including sleeves. I thought these sleeves might make a good bag holder. While we are all trying to reduce, sometimes you end up with those plastic shopping bags anyway, so here is something to hold them in!
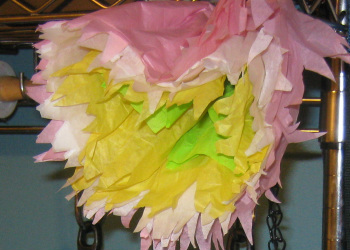
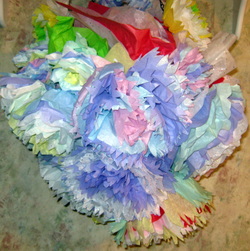
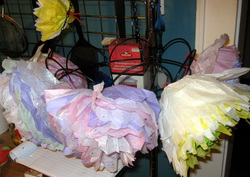
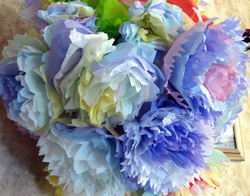
Hey everyone! I wanted to make something for my granddaughter’s room recently and when I stumbled on these flowers made with tissue paper or napkins, I knew this is what I had to make! But then I was hmm….where to put them? I purchased a wire hanging basket and made dozens of flowers in several sizes and then attached them to the basket. Worked awesome if I say so myself
These flowers are so simple and yet give you such a sense of satisfaction when you have completed them, I want to make them all day every day! I used tissue paper so will give instructions for that and will include the links for the napkin ones too.
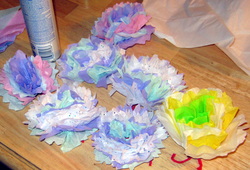
Basically take the tissue paper and lay flat adding as many layers as you want (the more layers the fluffier the flower)– I made my flowers with 8 sheets. Then decide what size you want your flowers? I had the standard sized tissue sheets and cut them into quarters this was one size flower; I took one of the quarters and halved it, giving me the smaller size. Due to some crooked cutting and other errors, I did end up with a few other random sized ones too. All part of the fun!
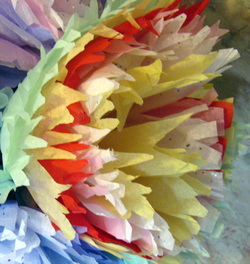
Next take your layered tissue paper and fold it accordion style, I used about 1 inch folds. Secure the middle with string or twist tie and then cut the two ends – use your imagination here as each way you cut the edges will make a whole new flower! I cut the ends into a round shape, triangular and wavy.
Gently holding the flower from the middle start pulling each individual sheet up from the edge to the middle. This makes the flower petals. I found that if they sheets seemed determined to stay together if I used one hand to pull forward and the other to gently pull back it helped. Now gently mold and fluff your flower until you have the desired effect!